Case study
Case Study: AI 3D Characters — Why Faces Go Soft, and the Bust Trick That Fixes Them
July 17, 2026 · 9 min read
This is a case study with real, unretouched results — including the part that didn't come out great. We generated the same character twice: once from a full-body image, once from a bust crop. The difference in face quality isn't a model upgrade or a settings trick; it's arithmetic about where the pixels go. Understanding it will save you money and get you dramatically better characters.
The input: a good image, done right
We started with this character concept — and as an input it checks every box from our input guide: single subject, plain background, even lighting, neutral A-pose, no watermark, nothing cropped by the frame.
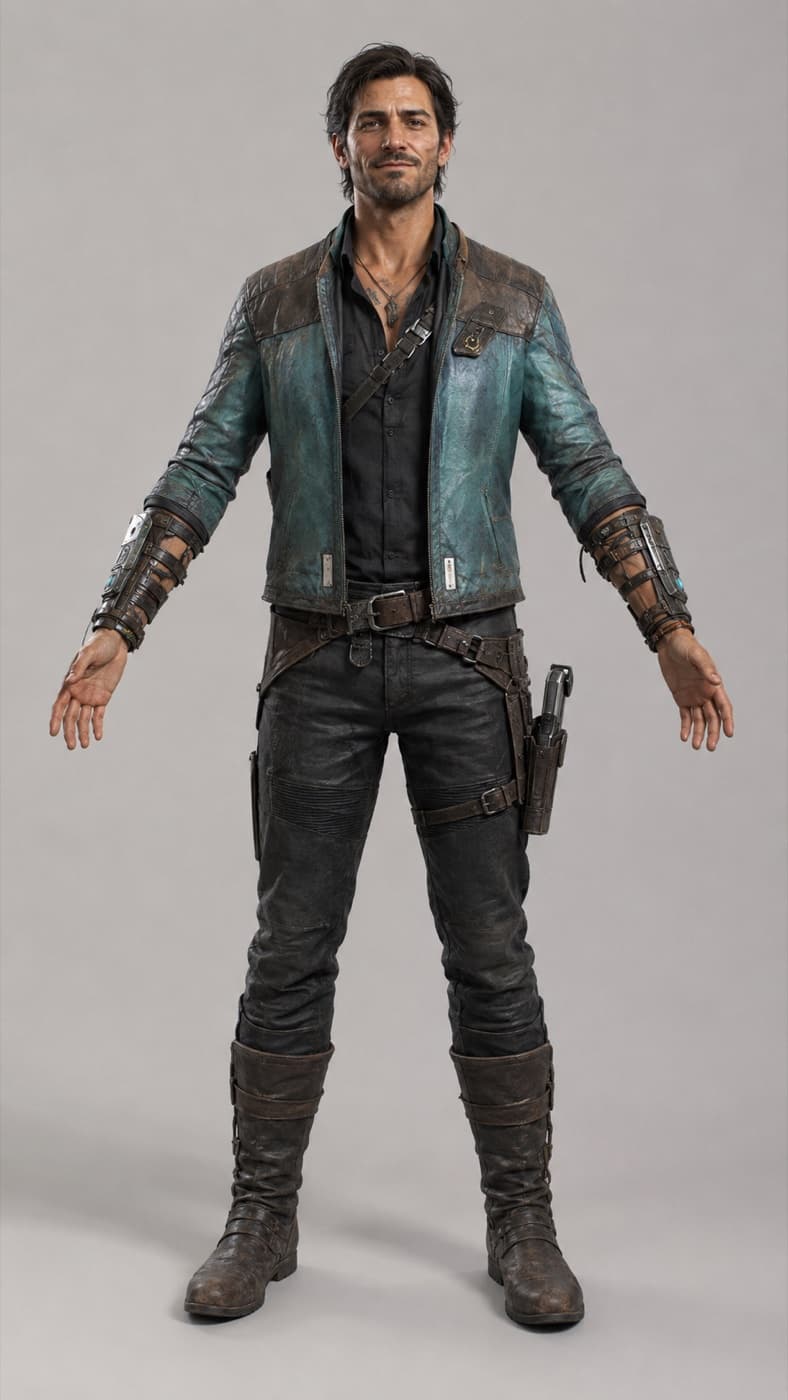
The full-body result
Here's what came back — spin it yourself. Default settings: 1024 texture, standard quality.
The body is genuinely good: the jacket reads as worn leather, the boots and straps hold up, the silhouette is clean, and the ~490k-triangle mesh is dense and even. At game-scene distance this is a usable character, straight out of the generator.
Now orbit in on the face. It's soft — the eyes, nose, and mouth are approximate, more "a face" than hisface. Hands show the same softness. If you've tried AI characters before, you've seen this exact failure, and it's usually blamed on "the model can't do faces." That's not quite what's happening.
Why faces go soft: the pixel budget
A generation carries a fixed budget of detail — a 1024×1024 texture and a fixed-resolution voxel grid for geometry. That budget is spread across the whole object. On a full-body character, the face occupies maybe 4% of the surface — so it receives roughly a 50-pixel square of texture and a handful of voxels. No model can put eyelids in a 50px square. Meanwhile the jacket, a huge low-detail surface, gets pixels to spare. The detail didn't fail to generate; it was budgeted away.
Once you see it as a budget, the fix is obvious: spend it all on the part you care about.
The fix: generate the bust separately
We cropped the same character to a classic bust — head, neck, shoulder slope, cut around the collarbone — and generated again.
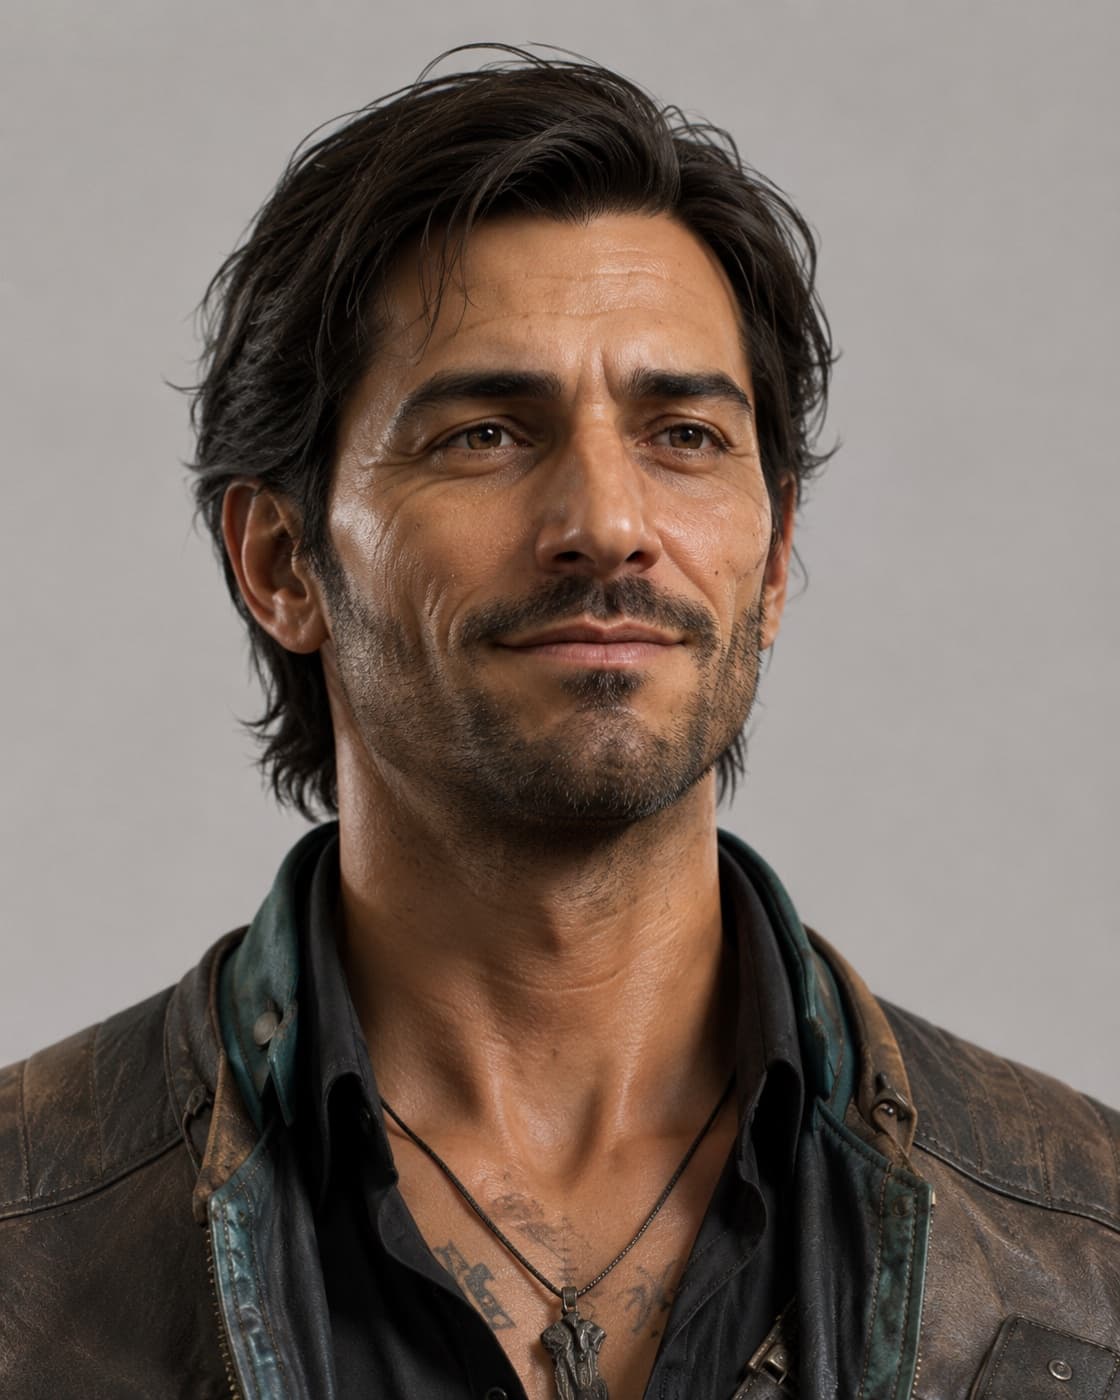
We ran the bust twice: once on default settings (1024 texture), once at 2048. Both are below, unretouched — orbit into the faces and compare them against each other and against the full body above.
Bust, default settings (1024 texture)
Already a different league from the full-body face — the crop alone did that. The geometry is confident: brow, nose, cheekbones, even the stubble line reads. But the texture is still spreading 1024 pixels over the whole bust, so skin detail stays a touch soft.
Bust, 2048 texture
Four times the texture pixels, and it shows exactly where the math said it would: skin, stubble, and the leather collar sharpen up while the geometry stays essentially the same. Crop concentrates the shape budget; texture size buys back the surface detail. For characters, use both.
The two things that still aren't perfect — and why
Honest inventory time. Two features on these busts still fall short of the input image, and they're not fixable with settings — they're the technology's real edges. Knowing them saves you rerolls.
Hair: it's solid geometry now
In game art, hair is never solid mesh — it's flat cards with transparency, or shader tricks. An image-to-3D model doesn't have that option: it must express hair as a closed solid surface. Chunky, contained hair survives that translation fine. Loose, layered, flyaway hair — like this character's — fuses into sculpted "action-figure hair," and burns a disproportionate share of the triangle budget doing it. The rule: contained silhouettes (short, tied back, or under a hat, hood, or helmet) convert cleanly; wisps fuse. For figurines and prints, sculpted hair is the aesthetic anyway. For a portrait render, pick or edit an input with a contained hairstyle.
Eyes: the honest edge
Look closely at the eyes on either bust and you'll see it — they're the least convincing part, and that's true of every AI-generated character from every tool. A real eye isn't a colored surface; it's an optical device — a wet, refractive cornea with a highlight that moves with the light. Game engines handle eyes with separate meshes and dedicated shaders for exactly this reason. A generated model bakes everything into flat texture, so the catchlight from the input image gets painted permanentlyonto the eyeball — and a highlight that doesn't move when you orbit is precisely what makes doll eyes read as dead. Add that humans have dedicated neural hardware for scrutinizing eyes, and a 40-pixel patch of texture gets held to a standard no buckle or bootstrap ever faces.
What to do about it: for 3D prints, nothing — sculpted eyes are normal. For rendering and games, the standard professional move (used on 3D scans of real actors, too) is an eye swap: flatten the eye sockets and drop in two shader-driven eyeball spheres. It's a five-minute job in Blender and instantly removes the uncanny look. Stylized characters sidestep the whole issue — painted-surface eyes are the correct look for a cartoon robot or a toon hero.
How to crop a bust that works
- Keep the neck and shoulder slope; cut around mid-chest. A classic sculptural bust is a shape the model understands, so it closes the bottom plausibly. A head cropped at the neck forces it to invent a stump — the ugliest place to improvise.
- Face at roughly a third to half the frame. Tighter buys little and costs base quality.
- Only the bottom edge should touch the subject. Leave clear background margin on the sides and top — a head clipped at the top of frame means invented hair and skull.
- A slight three-quarter head turn beats dead-frontal — it gives the model real evidence for nose projection and cheek depth.
The built-in cropper on the generate page does this without leaving the browser, before you spend anything.
Do you merge the bust and the body?
The question everyone asks next: how do you combine them into one model? The honest answer — you usually don't.They're two assets with two jobs:
- The full-body model is your scene asset — seen at gameplay distance, where its face is a few pixels tall and perfectly fine.
- The bust is your closeup asset — portrait renders, dialogue screens, a desk-worthy 3D print.
That's not a workaround; it's how game art already works — assets are built for the distance they'll be seen at (it's the same thinking behind LODs). For the advanced few: yes, you can head-swap in Blender — cut, align, join, hide the seam under a collar. The geometry is 20 minutes; the catch is textures, since each generation has its own UV atlas, so you keep two materials or re-bake. And a fully unified, deforming character (one mesh, one atlas, rigged) is a retopology-and-reprojection job — professional pipeline territory, the same cleanup a 3D scan needs. See where AI fits in a game pipeline.
Settings that matter for characters
- Texture size: pick 2048 for any character.It's 4× the pixels of the default, and faces and hands are where you'll see them.
- Reroll the seed for wrongness, not softness.A new seed changes what the model invents (back of the head, hair volume) — it cannot add resolution. If the face is mushy, re-crop; don't re-roll.
- Failed generations are refunded, and the cropper is free — so the experiment loop costs cents, not a subscription.
The takeaway
The input frame is a budget allocation. Frame the whole body and you buy a good body with a soft face; frame the bust and you buy a real face. Generate both, use each at the distance it was made for — that's the whole trick, and it's two pay-as-you-go generations.
Try it on your own asset
Upload an image or write a prompt and get a game-ready GLB back in minutes. Prepaid balance, flat price per model — no subscription, no lock-in.
Generate a 3D model